
01What onboarding looks like
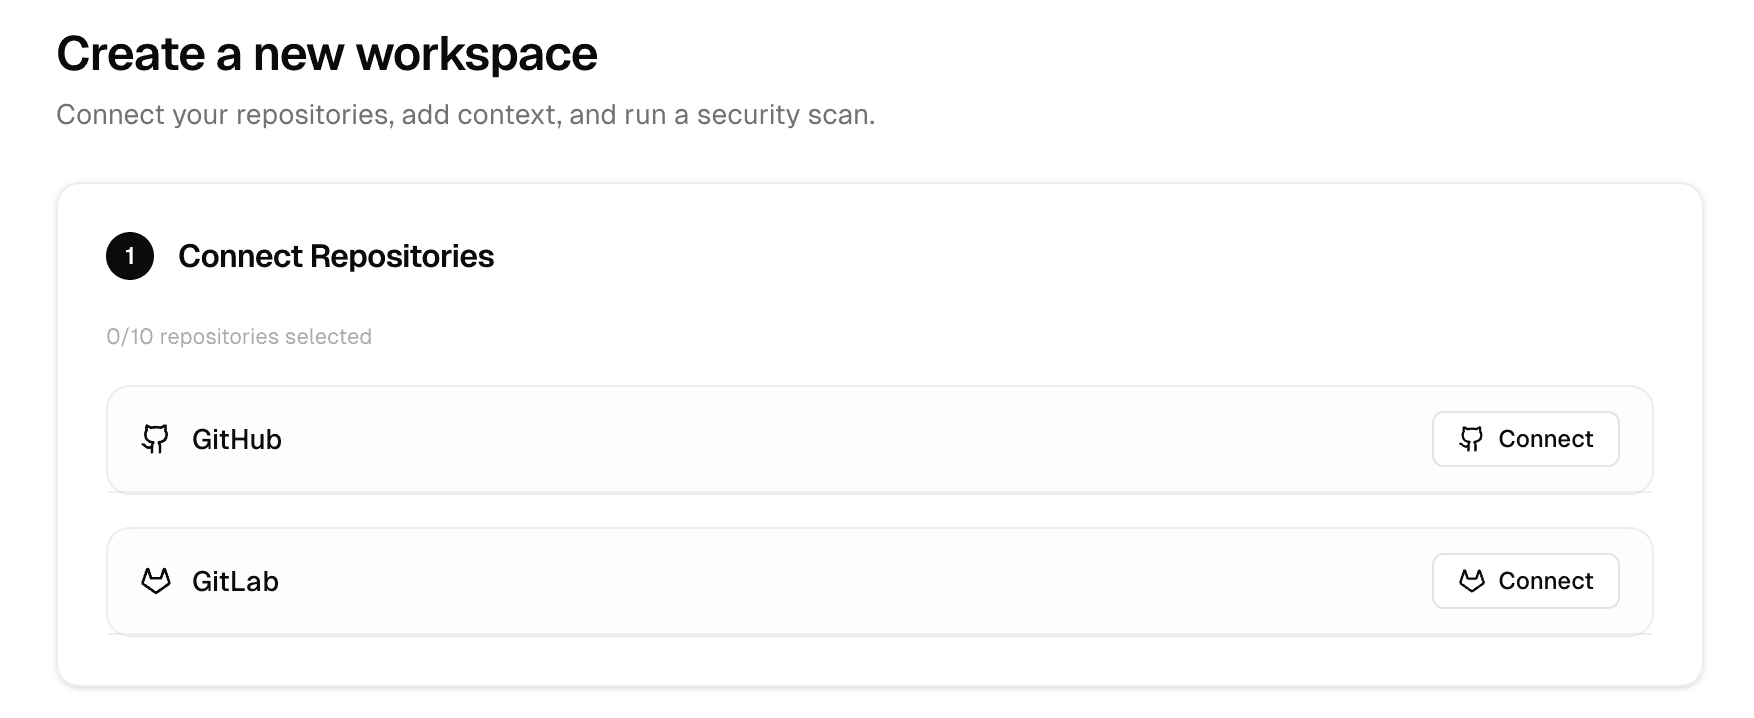
Apex does not need personal access from every engineer. GitHub usually connects through a GitHub App. GitLab supports OAuth or a service-account token. Connecting a provider unlocks repository import — teams still choose repos, refs, and docs before scans run.
- Connect a code hostDone once per company or workspace.
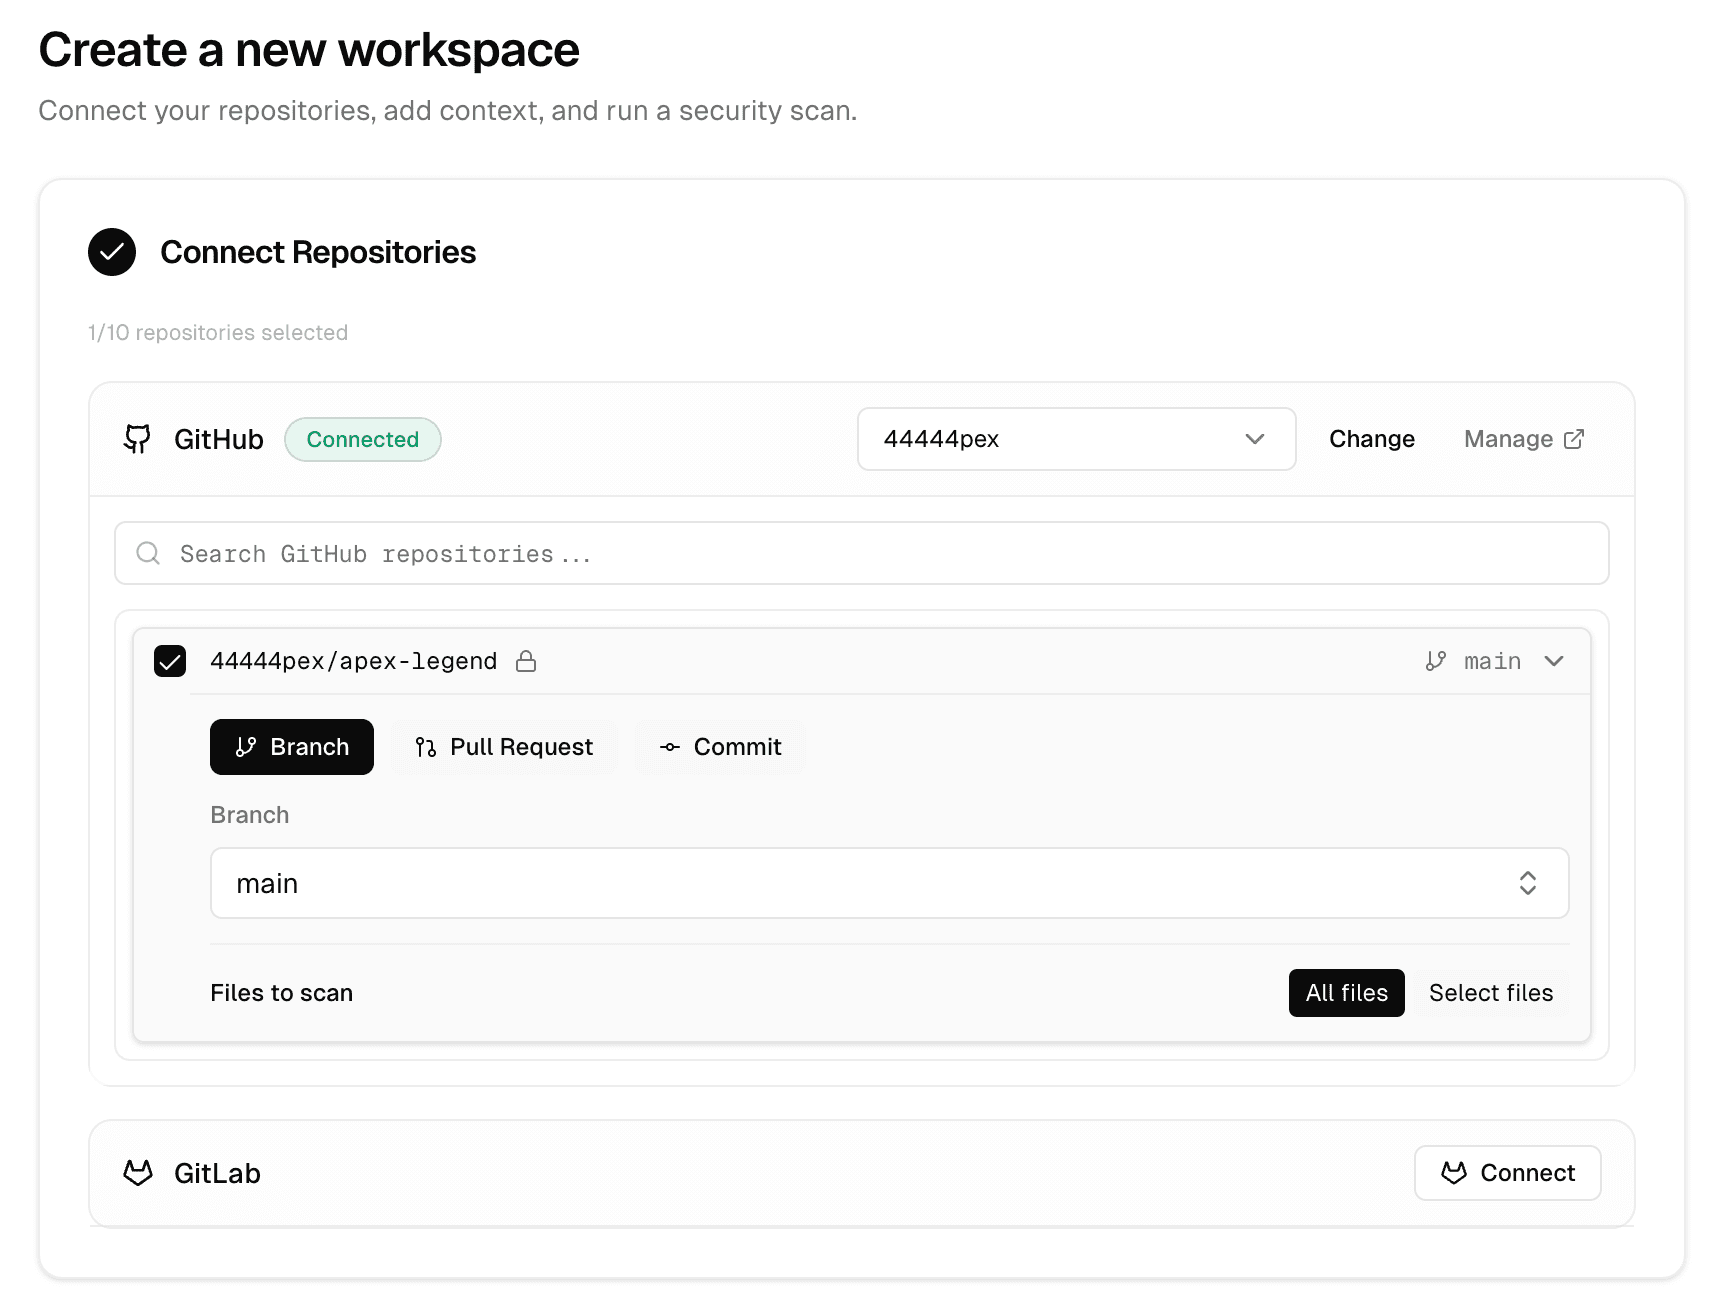
- Create a workspaceChoose the exact repositories in scope.
- Pick a ref for each repositoryBranch, pull request, or commit.
- Add supporting contextDocs, API specs, architecture notes, sharp edges.
- Run the scanOnly after scope and context look right.
02Try Apex without an account
Shared Standard-scan codes, including custom names such as TEST100, require Apex CLI 0.1.34 or newer. Each use provides either one Standard trial scan or 100% off one 200-credit checkout package. Both paths share the same redemption limit. A code with one use cannot fund both. Previously issued trial codes keep their original terms.
A Cantina-issued trial code can provision a temporary guest session before signup. Redemption does not open a browser or start device login. Run it from the repository you want to scan, then use the normal scan, status, and findings commands. Trial redemption, claim, and revocation are hosted-only and reject any APEX_BASE_URL origin other than https://ai.cantina.xyz before sending a code, claim proof, or guest bearer.
Copy-paste prompt for your coding agent
Paste this one line into Claude Code, Codex, Cursor, or another coding agent that can run terminal commands. The agent reads the current hosted workflow and asks whether you have a Cantina trial code. With a code, it installs the published CLI through npx, redeems the trial, and starts the scan immediately. Without one, it directs you to Cantina to sign up and purchase scan credits, then lets you start the scan on the Cantina website or return to your repository to use Apex. Sales-issued handoffs include the code on this same line, so the agent starts without asking again. No global install is required.
Read https://ai.cantina.xyz/skills/onboarding.md and follow the instructions to start a Cantina Apex scan.apex redeem APEX-<CAMPAIGN>-<CODE> --json
apex scan --non-interactive --json
apex status --json
apex findings --json
apex claimKeep trial codes scoped to redemption
Pass a trial code only to apex redeem. Do not echo it, save it in a repository, or send it through an MCP tool. Once a guest session exists, all normal read and scan tools use the shared credentials file. The read-only apex-trial-status MCP tool reports deadlines without returning the code or claim token.
Resume a guest scan safely
Parse redemption JSON from stdout only and keep npm warnings from stderr separate. An idempotent outcome resumes the same guest session and may already have a workspace. Before a guest standard scan reserves a workspace, Apex validates the complete local archive. If a renamed checkout has no binding, Apex may recover only the sole empty guest workspace; it will not reuse a workspace with scan history or override an explicit workspace selection.
Claim after seeing value
Guest CLI access lasts up to seven days. Run apex claim on the same machine within 30 days to create a Cantina account and keep the workspace, scan, and findings. Unclaimed guest data is retained only for the limited period disclosed during redemption and is then queued for deletion. Trial scans are limited to standard mode, three bounded sources, and the credits attached to the code. If you already use Cantina, claim moves the guest workspace, scan, and findings into your currently selected workspace when your membership can run scans there. Personal workspace owners receive the trial in that existing workspace instead of getting a duplicate. Keep the local credentials file until the claim completes. If the claim proof is lost while guest access is still active, rerun apex redeem <the-same-code> on that machine to rotate guest credentials and re-mint the proof over the authenticated guest channel. After guest access expires, the public code and machine fingerprint alone cannot safely recover a lost claim proof. If the claim request commits but its response is lost, retry apex claim: for 24 hours, the same account, machine, and locally held proof can receive a fresh token pair without converting or moving the trial data again. The retry resumes the already committed destination even if another workspace is currently selected. If Cantina reports that workspace access is still syncing, wait 30 seconds and rerun apex claim. Cantina does not return the new account credentials until every guest workspace is ready for normal account scans. Logging out of a guest trial—or discarding a proof-only trial stub—requires explicit confirmation because it revokes the trial when the server can still verify it and queues unclaimed data for deletion.
03Why Apex needs access
- Show repositories available to the connected company or workspace.
- Load branches, pull requests, commits, and repository trees during workspace setup.
- Pull selected source at the exact ref chosen for a scan.
- Keep private repositories in scope without asking users to package or upload code manually.
04GitHub onboarding
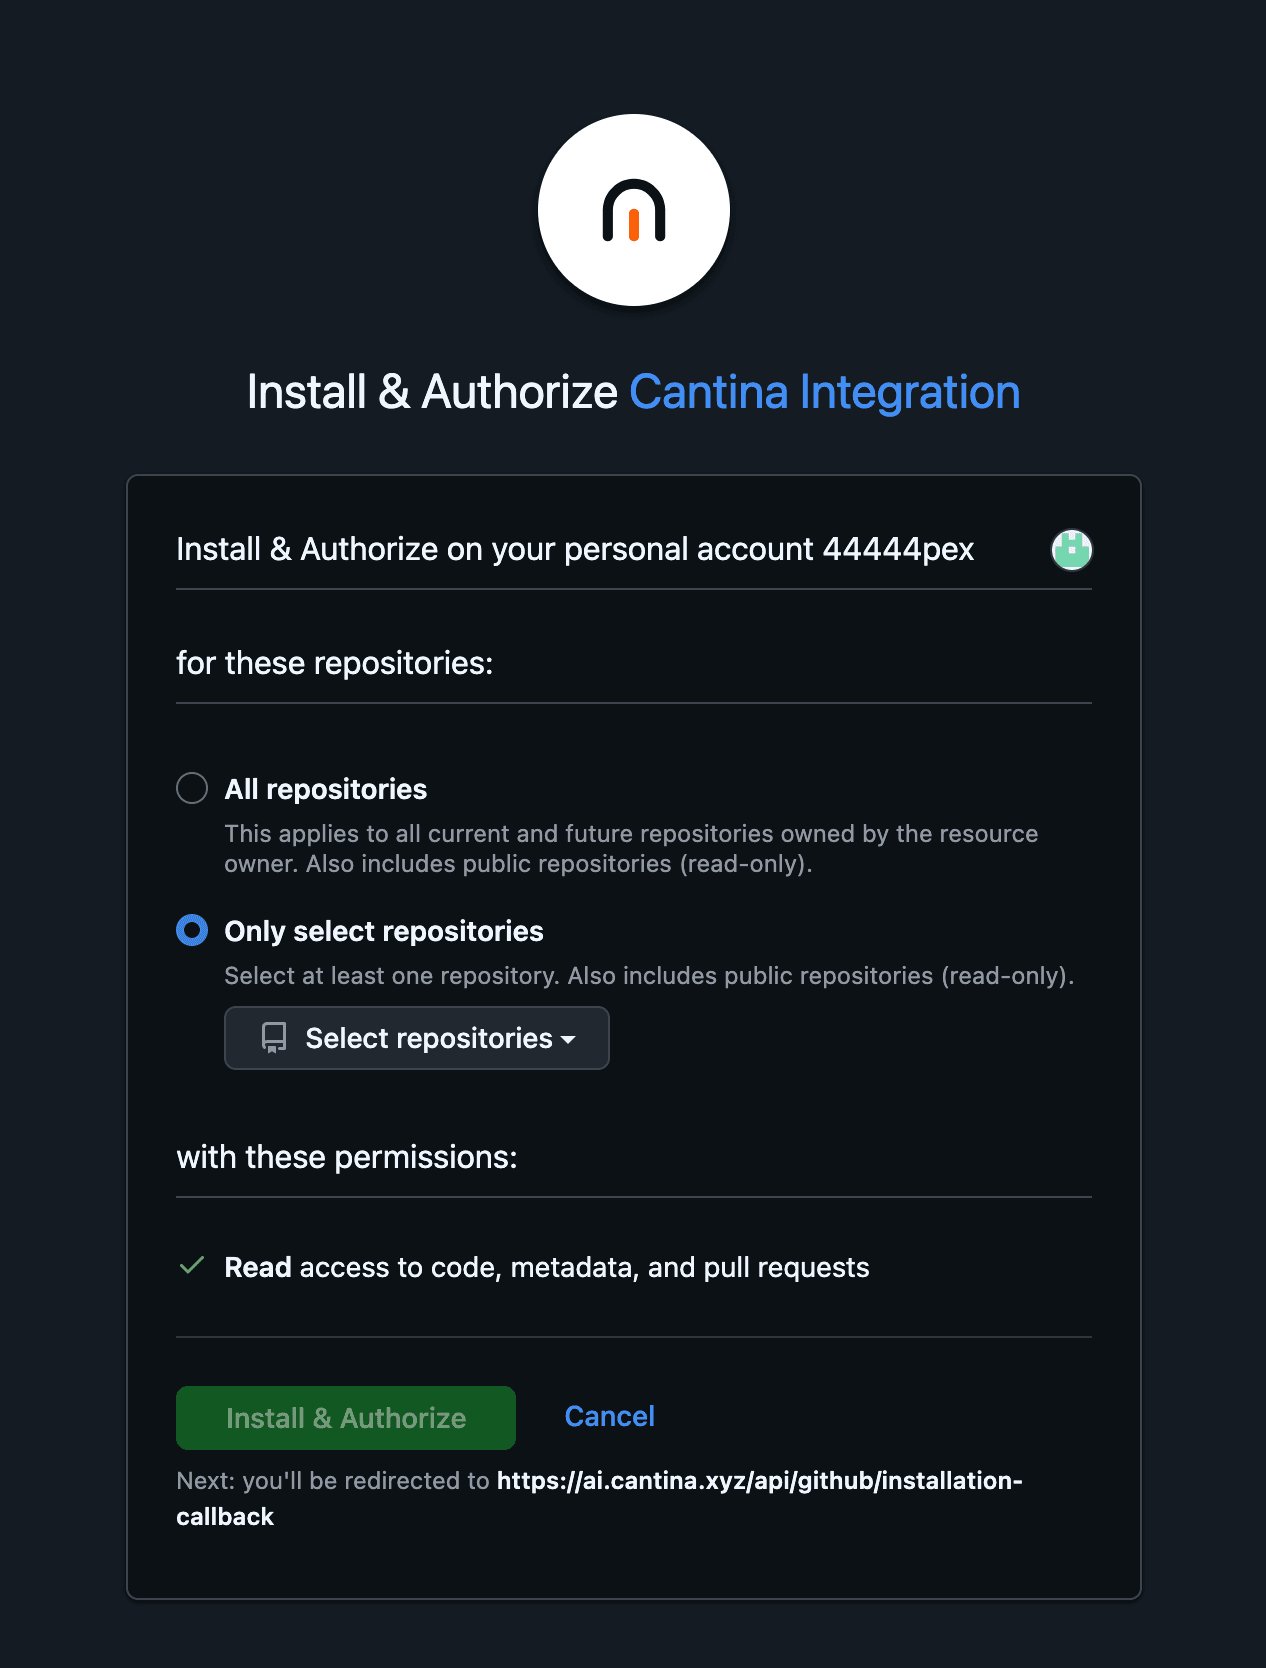
- Apex starts a GitHub App installation flow.
- An organization owner or repository admin may need to approve the installation.
- After installation, the team still chooses exact repositories per workspace.
- If approval is pending, workspace setup can continue and reconnect once approved.
05GitLab onboarding
- GitLab.com connects through the shared OAuth app.
- Self-hosted GitLab can connect through OAuth or token setup.
- Token setup accepts a personal access token or service-account token with API scope.
- A service-account token is the recommended default over an individual engineer token.
06What to send ahead
Send these before kickoff and the first workspace usually takes minutes, not days.
- Provider: GitHub, GitLab.com, or self-hosted GitLab.
- Organization, account, or group owner — plus the person who can approve the connection.
- Repositories in scope and expected default branches, pull requests, or commits.
- Documentation: architecture, permissions, trust boundaries, key integrations, deployment shape.
- Priority-shaping context: sharp edges, sensitive flows, threat-model constraints, bug classes that matter.